Water around the base only while the zone runs usually comes from a worn wiper seal, split sprinkler body, cracked riser, loose threaded connection, or broken swing joint. A nozzle change will not repair a below-ground connection leak.
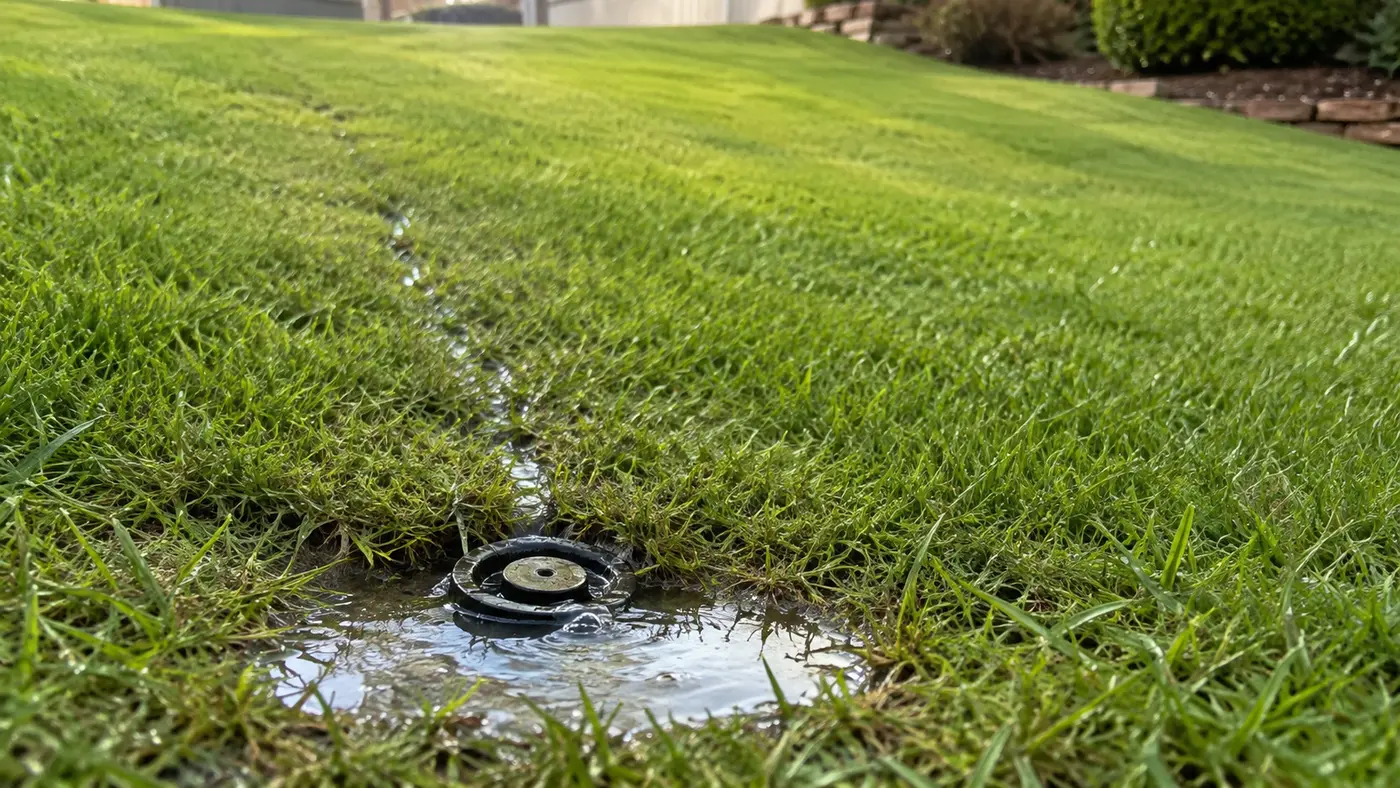
The height of the first water changes the repair
Dry the head first and look for the first wet point—not the largest puddle after water has migrated through soil.
| First wet point | Most likely part | What usually fixes it |
|---|---|---|
| Around raised stem | Wiper/riser seal | Clean or replace exact seal/body |
| Cap-to-body seam or housing side | Cap seal or cracked body | Reseat matched parts or replace body |
| Threads directly below body | Riser or adapter | Replace damaged matched fitting |
| Soil below a dry body | Swing joint/elbow/lateral | Expose and repair the connection |
Use this boundary: Flow that continues with the zone off needs a separate low-head-drainage or passing-valve diagnosis.
The first wet height identifies four different repairs
Do not diagnose from the finished puddle. Dry the head, start the zone briefly, and watch stem, cap, body, and soil in that order.
| First wet location | Supported explanation | Repair boundary |
|---|---|---|
| Around the raised spray stem | A pressure-activated wiper seal is controlling flow-by | Clean the stem/cap interface or service the exact seal/body |
| Around a rotor riser stem | Hunter identifies a worn or contaminated riser seal as a local cause | Use the exact rotor seal procedure or replace the matched assembly |
| Cap seam or sidewall | A loose cap, trapped debris, or cracked body can leak above the connection | Reseat supported parts or replace the body |
| Threads or fitting below a dry body | Rain Bird directs inspection of the riser/connector below the head | Replace the damaged fitting while supporting the lateral |
| Nozzle after shutdown at the low point | A check-valve body can prevent low-head drainage; Rain Bird SAM is rated for up to 14 ft of elevation | Time the drainage separately before blaming the base seal |
What the sample changes: Replacing the visible head solves only failures at or above its inlet. Water that first appears below a dry body requires exposing the connection, not a second nozzle.
Manufacturer service and product pages were reviewed August 30, 2026. The table distinguishes an operating leak from off-cycle drainage because those states lead to different repairs.Match the pattern before opening anything
| Possible cause | Best clue | First check |
|---|---|---|
| Worn stem seal | Water gushes around the pop-up stem | Compare leakage with a neighboring head |
| Cracked body | Water escapes through the side of the housing | Expose the body with zone off |
| Loose riser or swing joint | Soil bubbles below the body | Inspect the threaded connection |
| Broken lateral fitting | Large soft area forms around the head | Run briefly and mark the wet boundary |
Read the system before replacing a part
Use the observation that most closely matches your yard. Each row changes the next test, so you do not spend an afternoon proving the wrong theory.
What it meansThe wiper/riser seal is worn, dirty, or not seating under operating pressure.
Do nextCompare flow-by with an identical nearby head and the model's seal procedure.
What it meansThe housing, cap, or body seal is damaged or misassembled.
Do nextExpose the body after shutdown and replace the matched part.
What it meansThe threaded riser, swing joint, elbow, or lateral fitting is leaking.
Do nextHold the pipe steady while exposing the immediate connection.
What it meansLow-head drainage or a passing zone valve may coexist with the operating leak.
Do nextTime the off-cycle flow separately before blaming the head body.
Four tests that narrow the fault
Stop as soon as one result gives you a clear boundary. The goal is not to perform every test; it is to eliminate whole groups of causes safely.
- 01
Watch the first wet height
Dry the head, start the zone briefly, and observe stem, cap/body seam, housing side, and soil in that order.
IF YES / NORMALThe first wet point identifies the repair layer.
IF NO / ABNORMALMigrating water requires a second test after the area drains.
- 02
Compare stem-seal flow-by
Observe an equivalent working head during full pop-up under the same zone pressure.
IF YES / NORMALSimilar brief rinse that stops may be normal seating behavior.
IF NO / ABNORMALPersistent heavier flow at one stem supports seal/body service.
- 03
Expose the body with water off
Cut a neat turf plug, excavate around—not under—the body, and avoid twisting the buried pipe.
IF YES / NORMALA body crack or threaded leak is visible.
IF NO / ABNORMALWater rising from below the connection shifts the search to swing joint or lateral fitting.
- 04
Retest before backfill
Support the repaired head at finish grade and run three start/stop cycles while the joint remains visible.
IF YES / NORMALThe stem rises, the joint stays dry, and the head retracts.
IF NO / ABNORMALMisalignment, a second crack, or off-cycle valve seep remains.
Numbers worth measuring
Supports stem, body, riser, or downstream fitting; continuous off-cycle flow needs a valve/drainage test.
Common fixes that waste time
The nozzle shapes spray; it cannot seal a cracked riser or elbow.
It hides evidence while pressurized water continues eroding the connection.
Extra torque can split threads or fittings and make alignment worse.
How the evidence changes the repair
A head sprayed weakly while a puddle formed around its base only during operation.
- The raised stem and cap stayed dry.
- Water first bubbled below the body.
- Excavation exposed a split threaded riser; the lateral and body were intact.
Locating the first wet height prevented an unnecessary head replacement. A matched riser repaired the pressure loss, and three visible retests confirmed the connection before backfill.
How to confirm the repair actually held
A single successful start can hide an intermittent splice, sticky valve, remaining leak, or scheduling problem. Recreate the original conditions before calling the job finished.
Pass: Stem, body, threads, and buried connection remain dry.
If not: The first wet height identifies the remaining fault.
Pass: No continuing seep or new puddle appears.
If not: Low-head drainage or a passing valve may coexist.
Pass: The head is supported vertically and retracts without sticking.
If not: Realign before compacting soil.
Check these in order
- 01
Run the zone briefly
Watch whether water comes from the stem, body seam, or soil below. Turn the zone off before touching the head or excavating.
- 02
Compare normal seal leakage
A small initial rinse around some pop-up stems may stop as the seal seats. Continuous heavy flow that reduces spray performance indicates wear or damage.
- 03
Expose without pulling the pipe
Cut a neat turf plug and remove soil around the body. Hold the pipe connection steady; twisting the head aggressively can crack an older fitting below.
- 04
Inspect the connection
Check the riser, funny-pipe elbow, and threads for splits or misalignment. Replace damaged fittings rather than adding layers of force or unsupported adapters.
- 05
Restore grade and alignment
Install the matched body vertically with its cap near finish grade, flush if permitted, and compact soil gently so the head is supported without pinching the lateral.
- The leak continues with the irrigation supply on and every zone off.
- The damaged fitting is under concrete or near utilities.
- The lateral pipe has split beyond the head connection.
What homeowners ask about this symptom
Will replacing the nozzle stop a base leak?
Usually not. A nozzle controls the spray opening. Base leakage more often involves the stem seal, body, riser, swing joint, or lateral fitting.
Why is the grass very green around the leaking head?
Repeated below-ground leakage can overwater that small area even when the visible spray looks weak, creating unusually lush growth or soft soil.
Sources and review notes
General maintenance logic is checked against EPA WaterSense outdoor irrigation guidance. Product controls and disassembly steps vary by model; use the current manufacturer manual for your exact valve, controller, or sprinkler head.